Access Management: Combine Roles Flexibly
With the new Access Management, you can now assign tasks across your Team with even greater precision. A Team Member can hold multiple roles and permissions at once—tailored to the tasks they take on in your LearningSuite.
For example, one person can edit courses and manage the Event Plan. Or support members and organize bundles. You don't have to give them full admin access to do it.
Multiple Roles for One Team Member
In many Teams, one person takes on more than one task. That's exactly what the new multi-role system is built for.
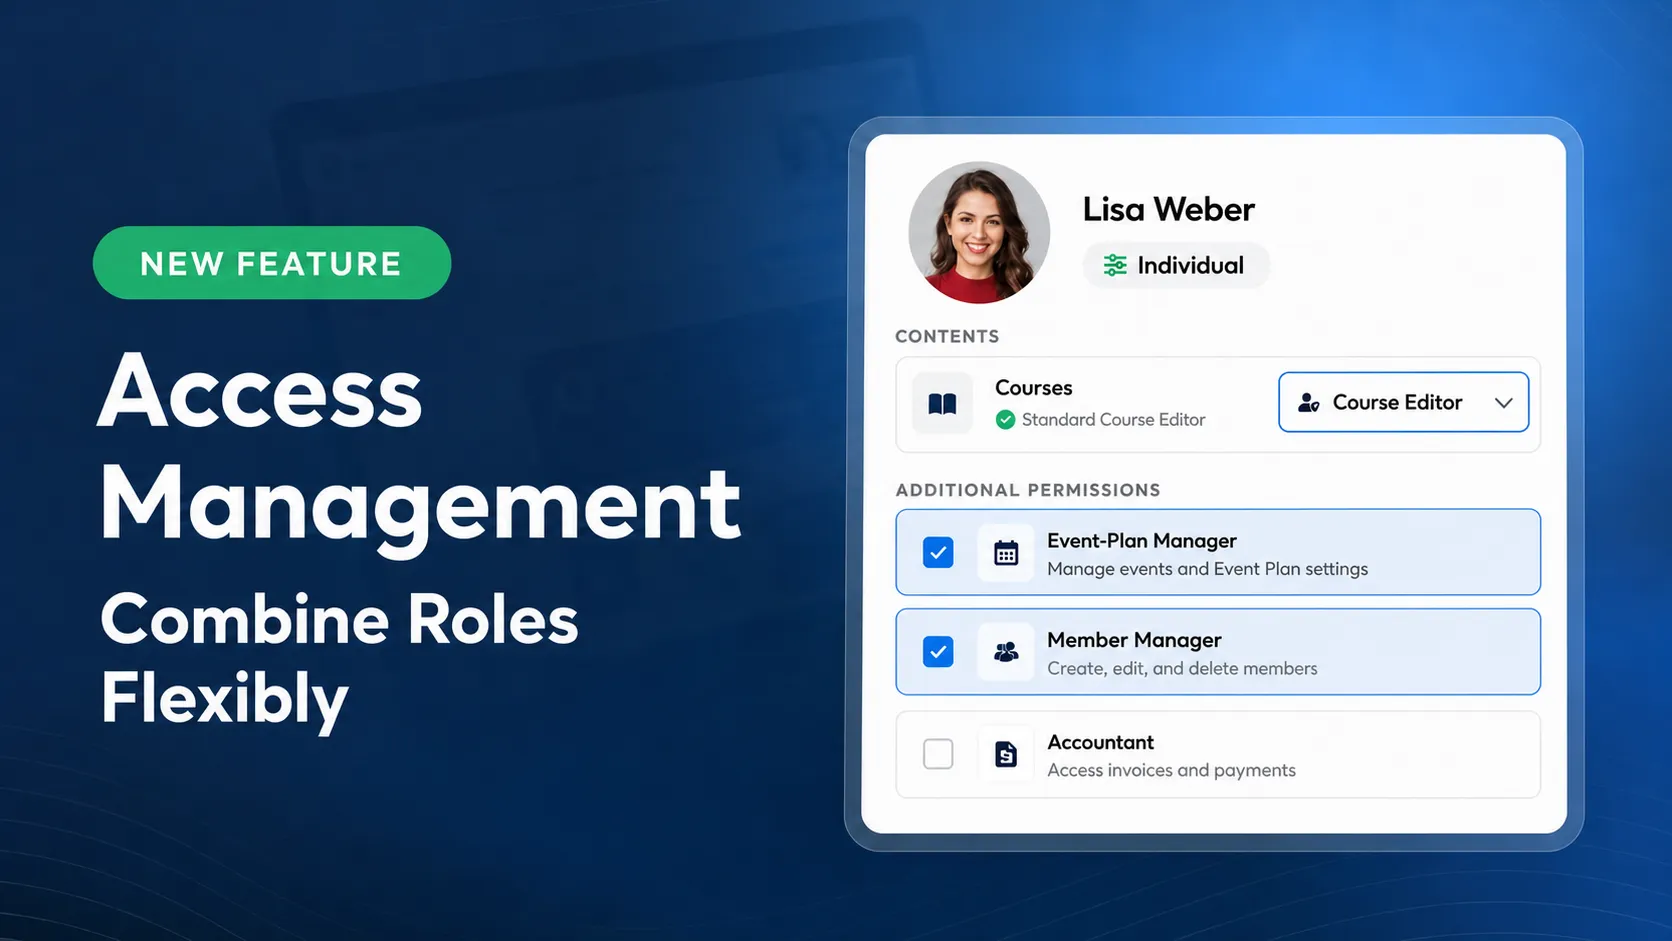
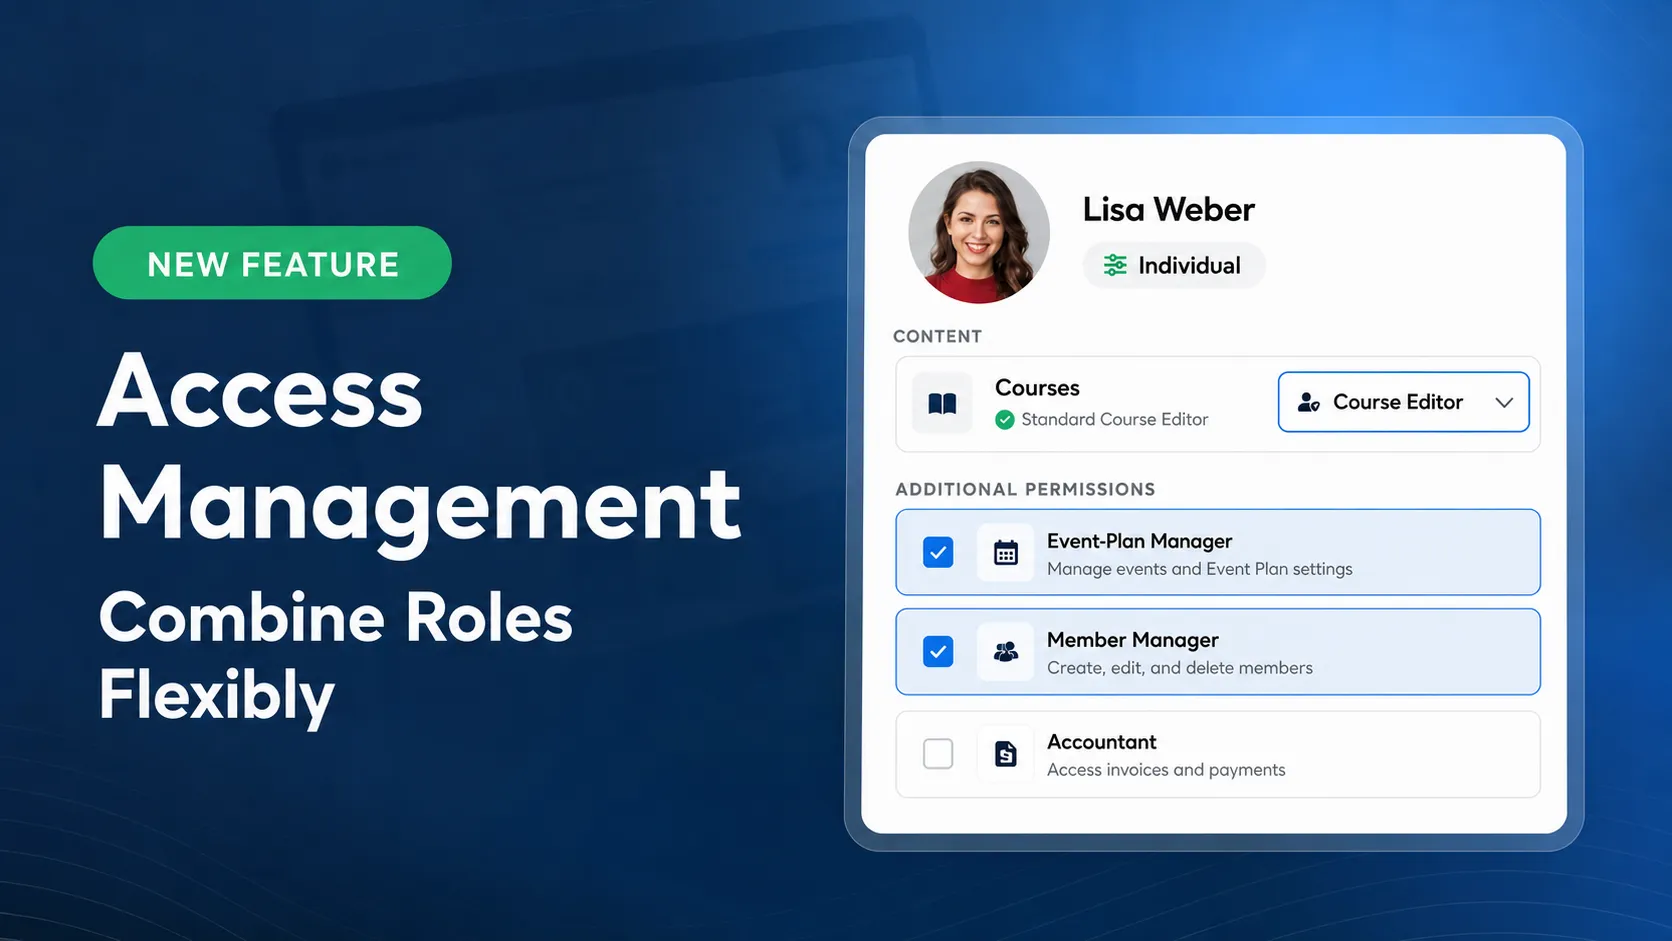
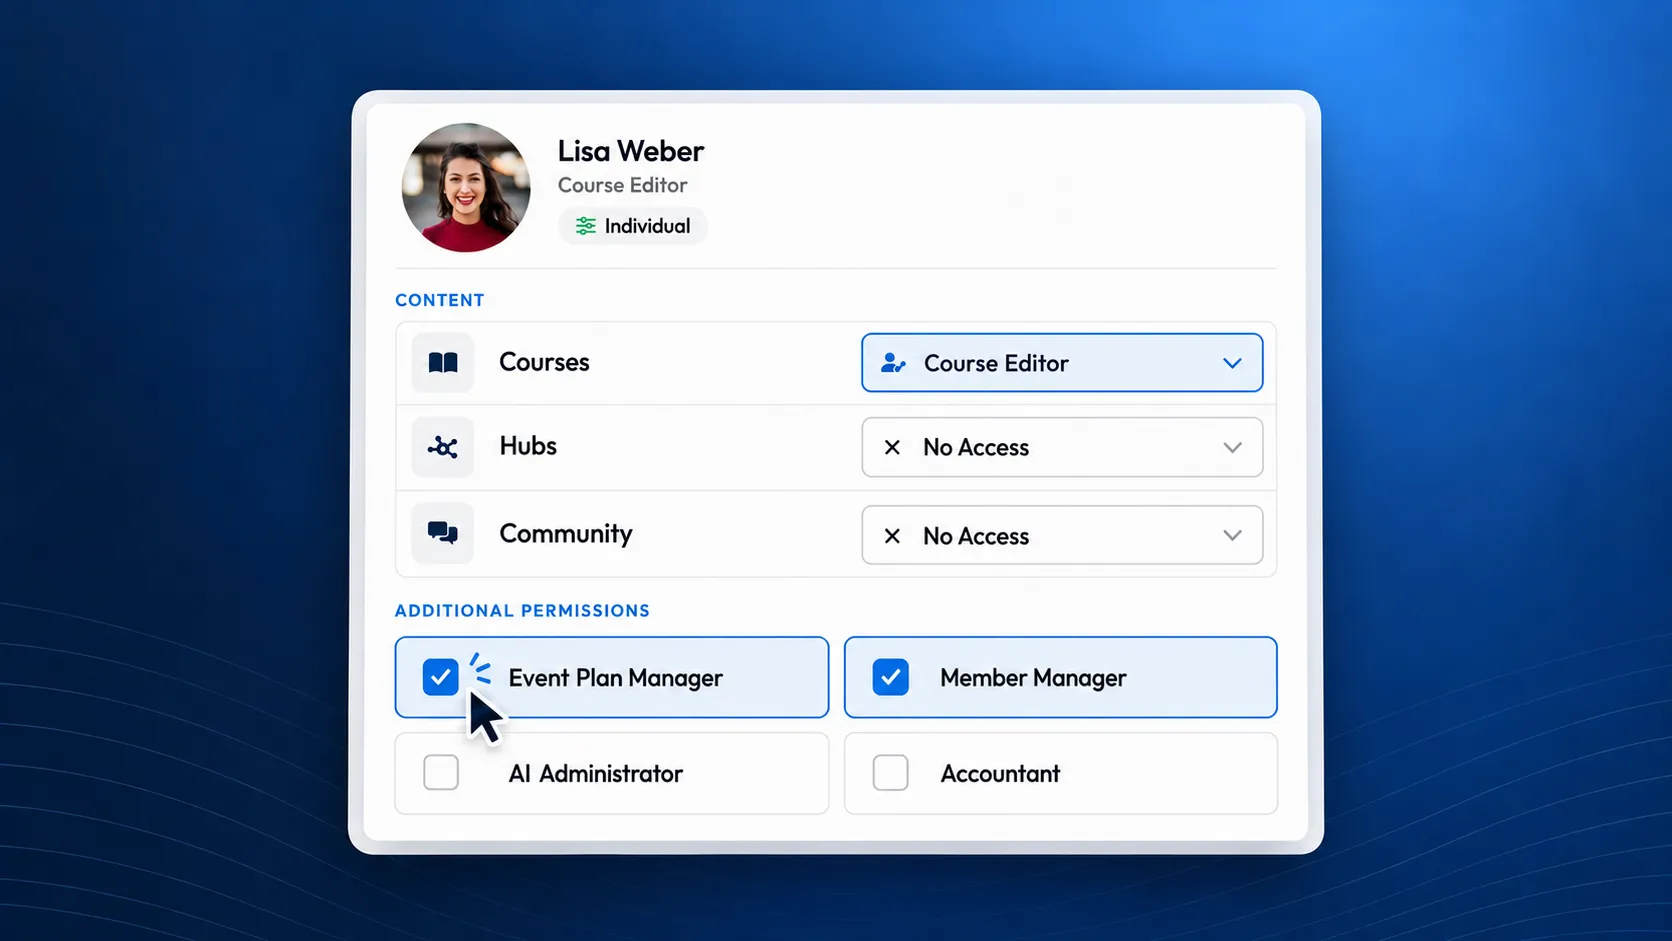
You can combine content roles for courses, Hubs, and the Community with additional permissions for individual admin areas. This lets you align permissions more closely with how your Team actually works together.
For example, an employee creates your learning content and organizes your live calls. They receive the Course Editor role plus the Event Plan Manager permission. This lets them handle both tasks directly in LearningSuite.
Assign Additional Permissions Precisely
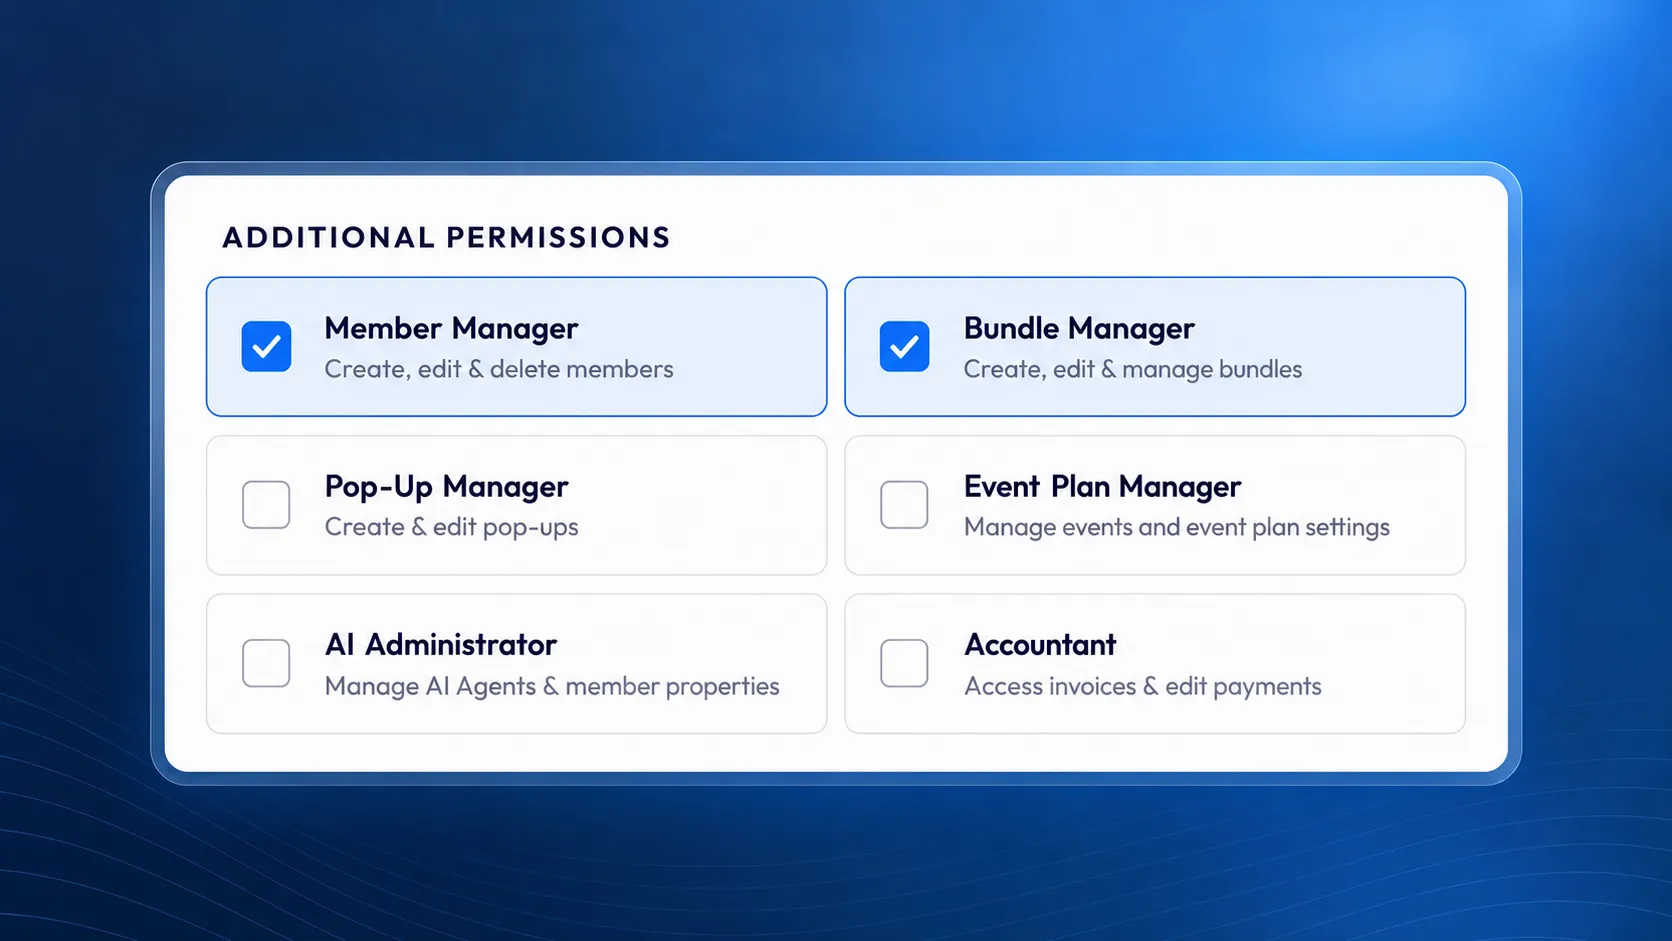
Predefined permissions are available for common tasks. You can assign them individually or combine them:
- Member Manager: Create, edit, and delete members.
- Bundle Manager: Create, edit, and manage bundles.
- Pop-up Manager: Create and edit Pop-ups.
- Event Plan Manager: Manage events and Event Plan settings.
- AI Administrator: Manage AI Agents, the AI Concierge, and Member Properties.
- Accountant: Access invoices and edit payment and invoice data.
This means you can give your accounting team access to the billing area or put your marketing employees in charge of managing Pop-ups.
Grant Team Members Access to Specific Courses and Hubs
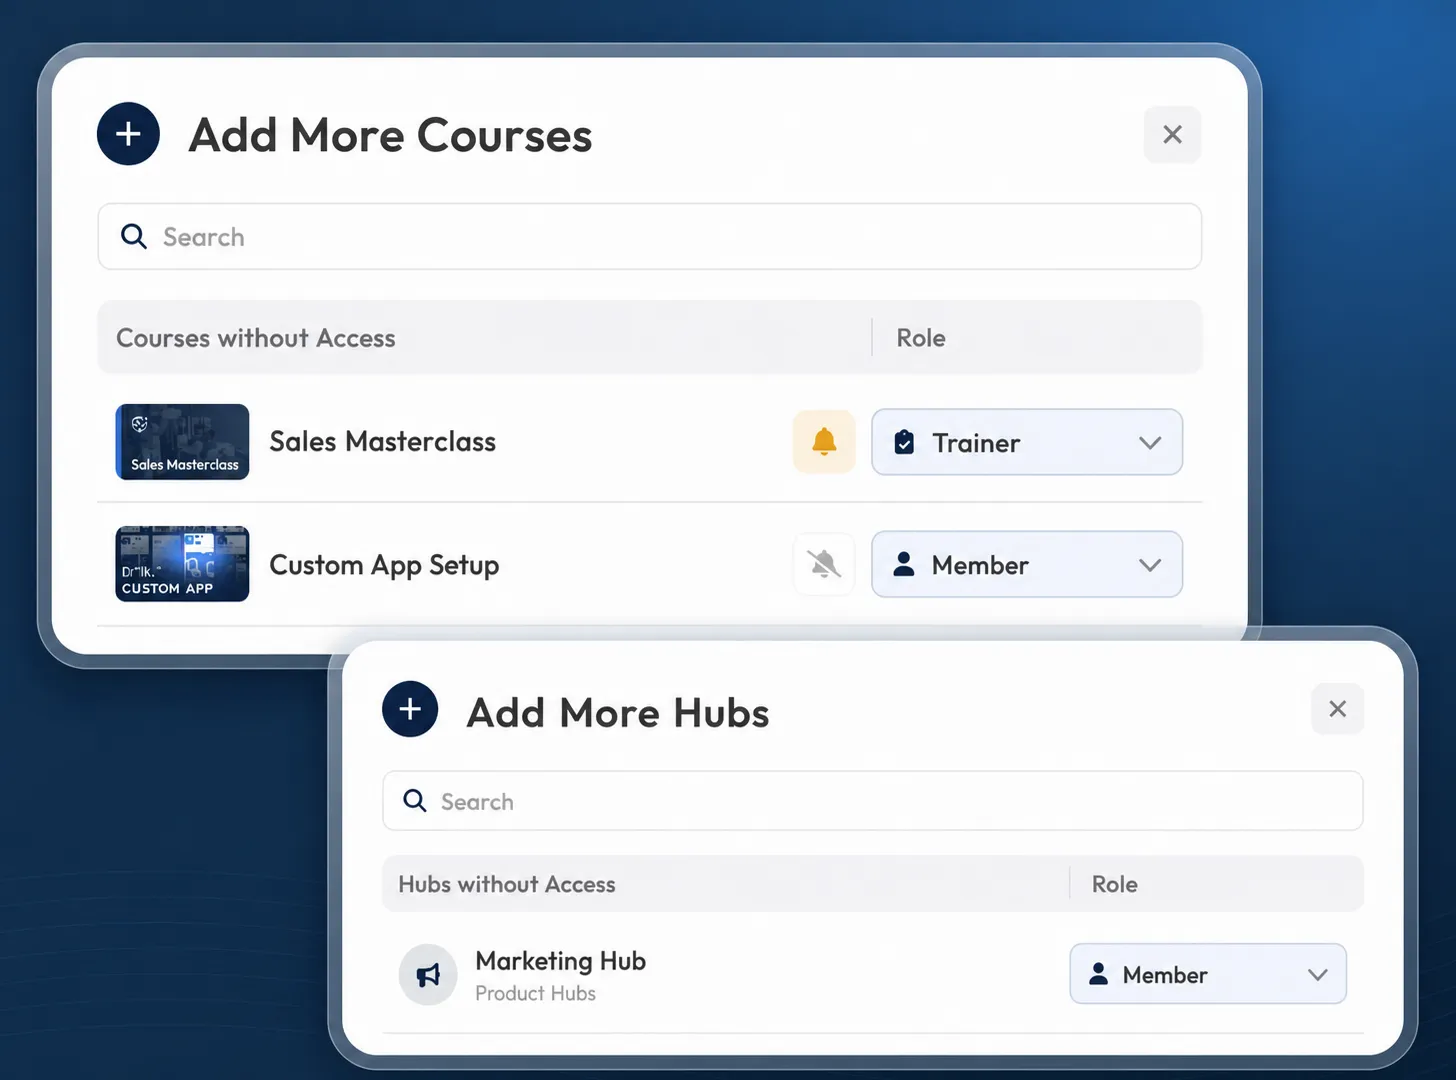
You can assign Team Members any course role for individual courses: Course Admin, Course Editor, Coach, or Member. For example, a person can edit one course as a Course Editor, grade submissions in another as a Coach, and take part in a third as a Member.
You can also grant Team Members access to individual Hubs: as a Member, so they can view the information provided there, or as an Editor, so they can edit the Hub too.
Roles and Permissions in One Place
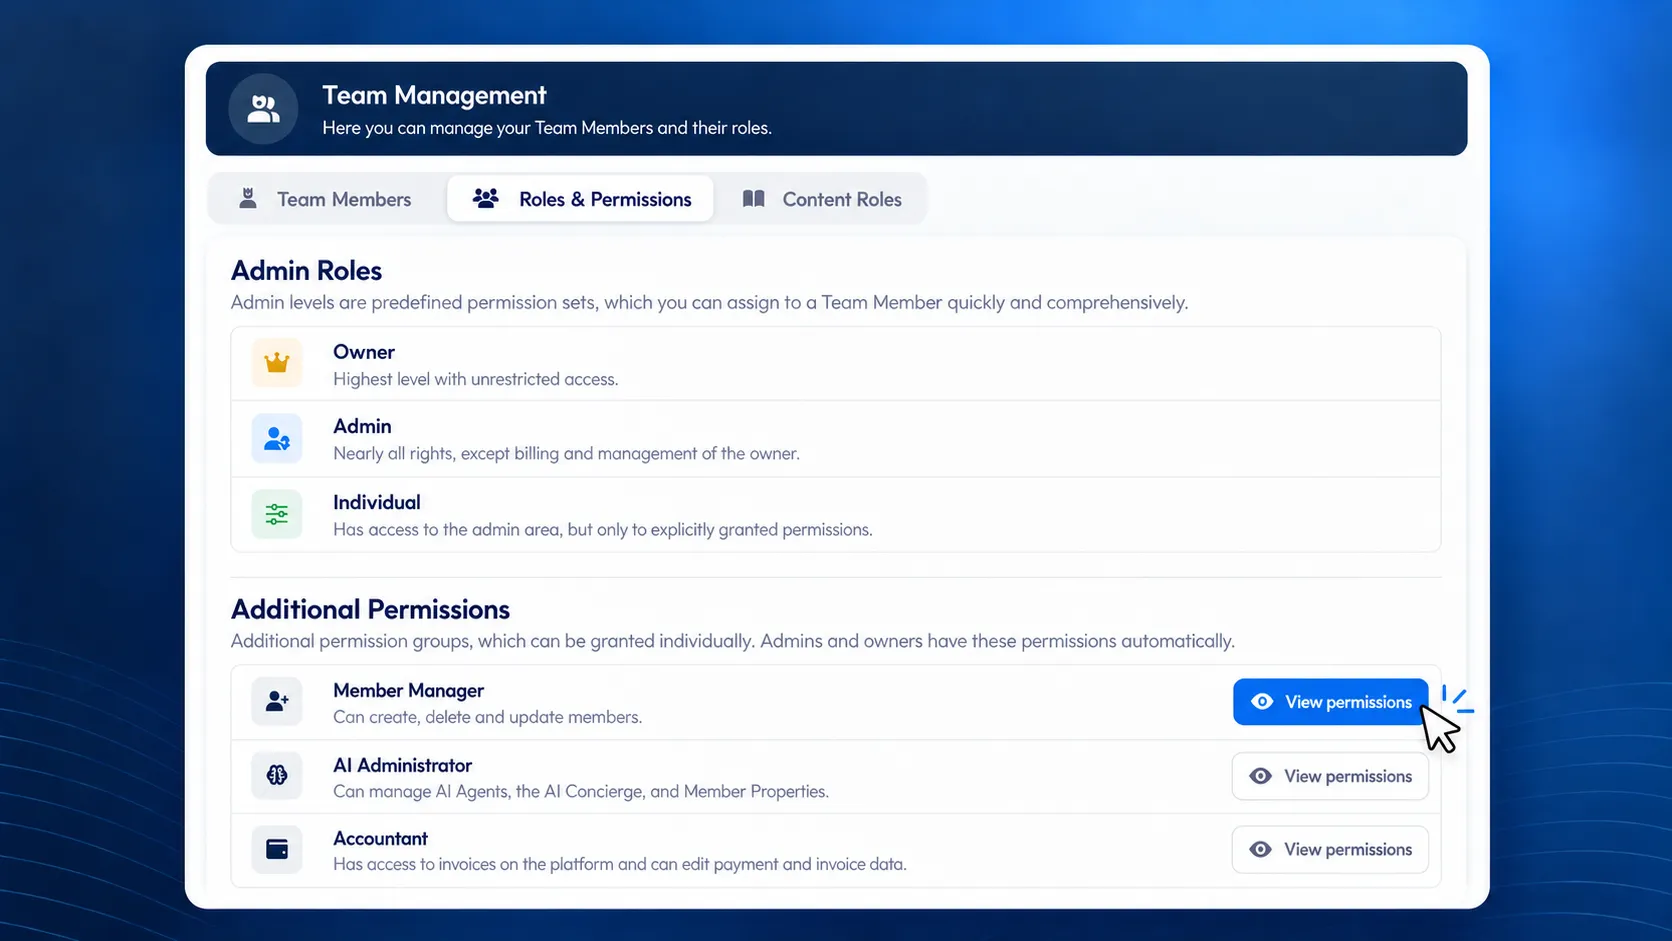
In Team Management, you'll find your Team Members' roles clearly organized in one place.
Under “Roles & Permissions,” you can see which permissions each predefined role includes. This makes it easier to decide which combination fits a specific task.
To adjust existing access, open the relevant Team Member under “Team” and switch to the “Roles” tab. There, you can combine content roles and additional permissions.
Included: Advanced Access Management
Advanced Access Management is already included in your Business package. It lets you tailor permissions even more precisely to your organization.
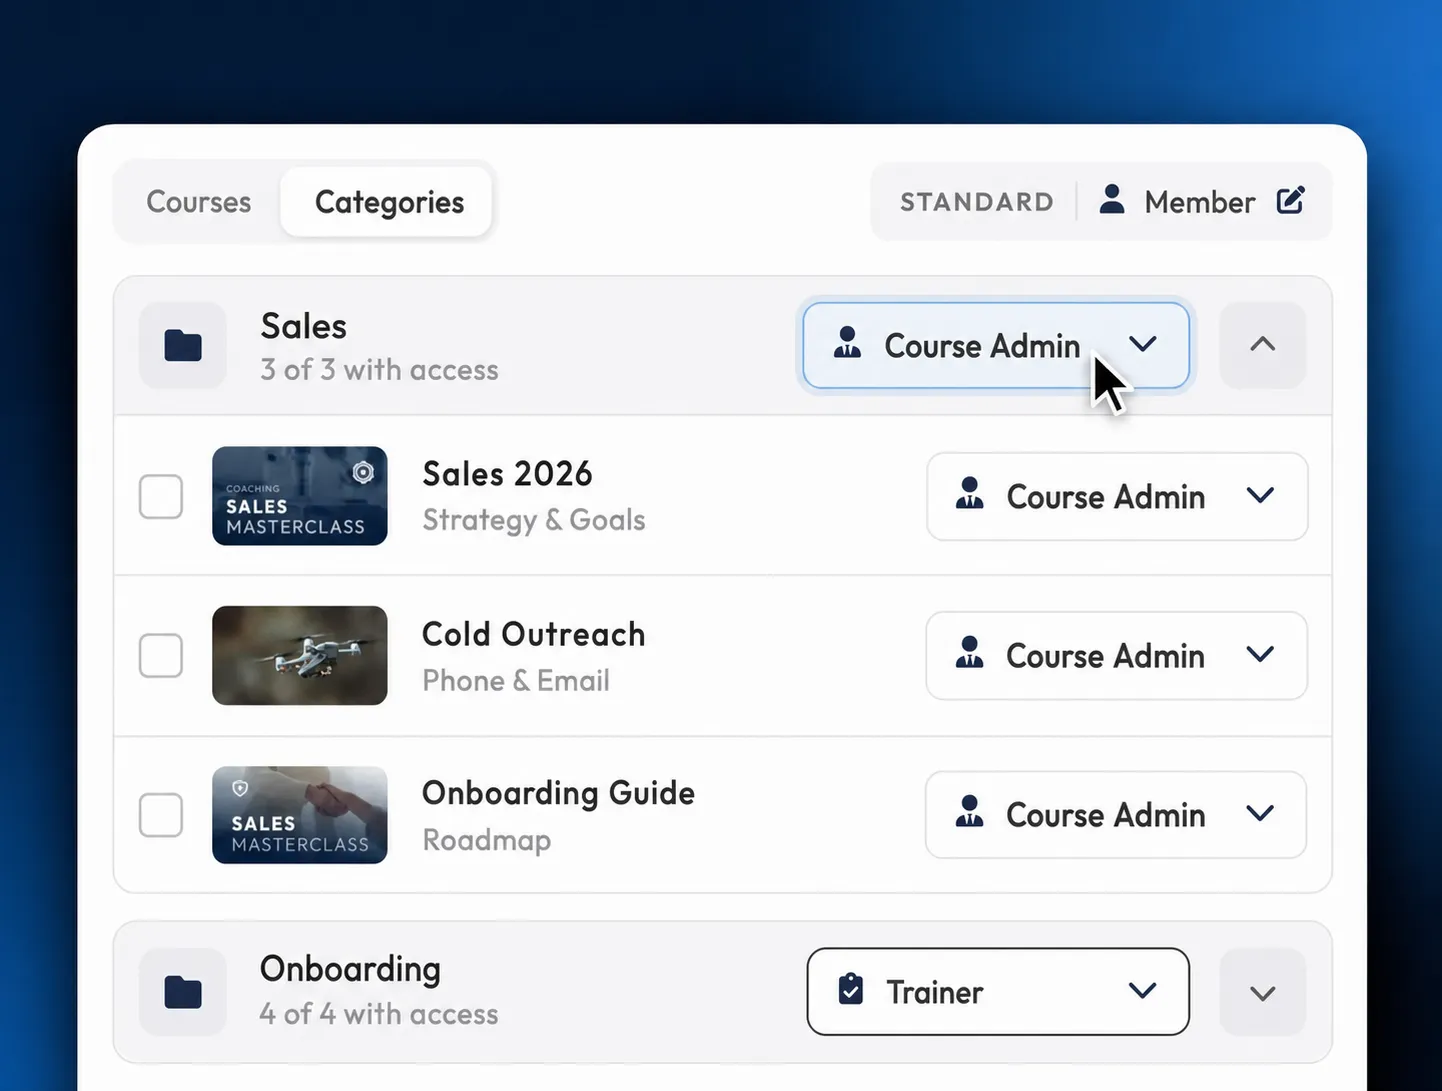
Assign Roles to Entire Categories
Instead of granting access to every course and Hub individually, assign a role directly to an entire course or Hub category. Courses and Hubs added to that category later are automatically included.
For example, your Head of Sales becomes Course Admin for the “Sales” category. Every new sales course is immediately available to them, without you having to update permissions.
You'll find categories in a Team Member's “Roles” tab, under “Categories” for both courses and Hubs.
Create Custom Course Roles
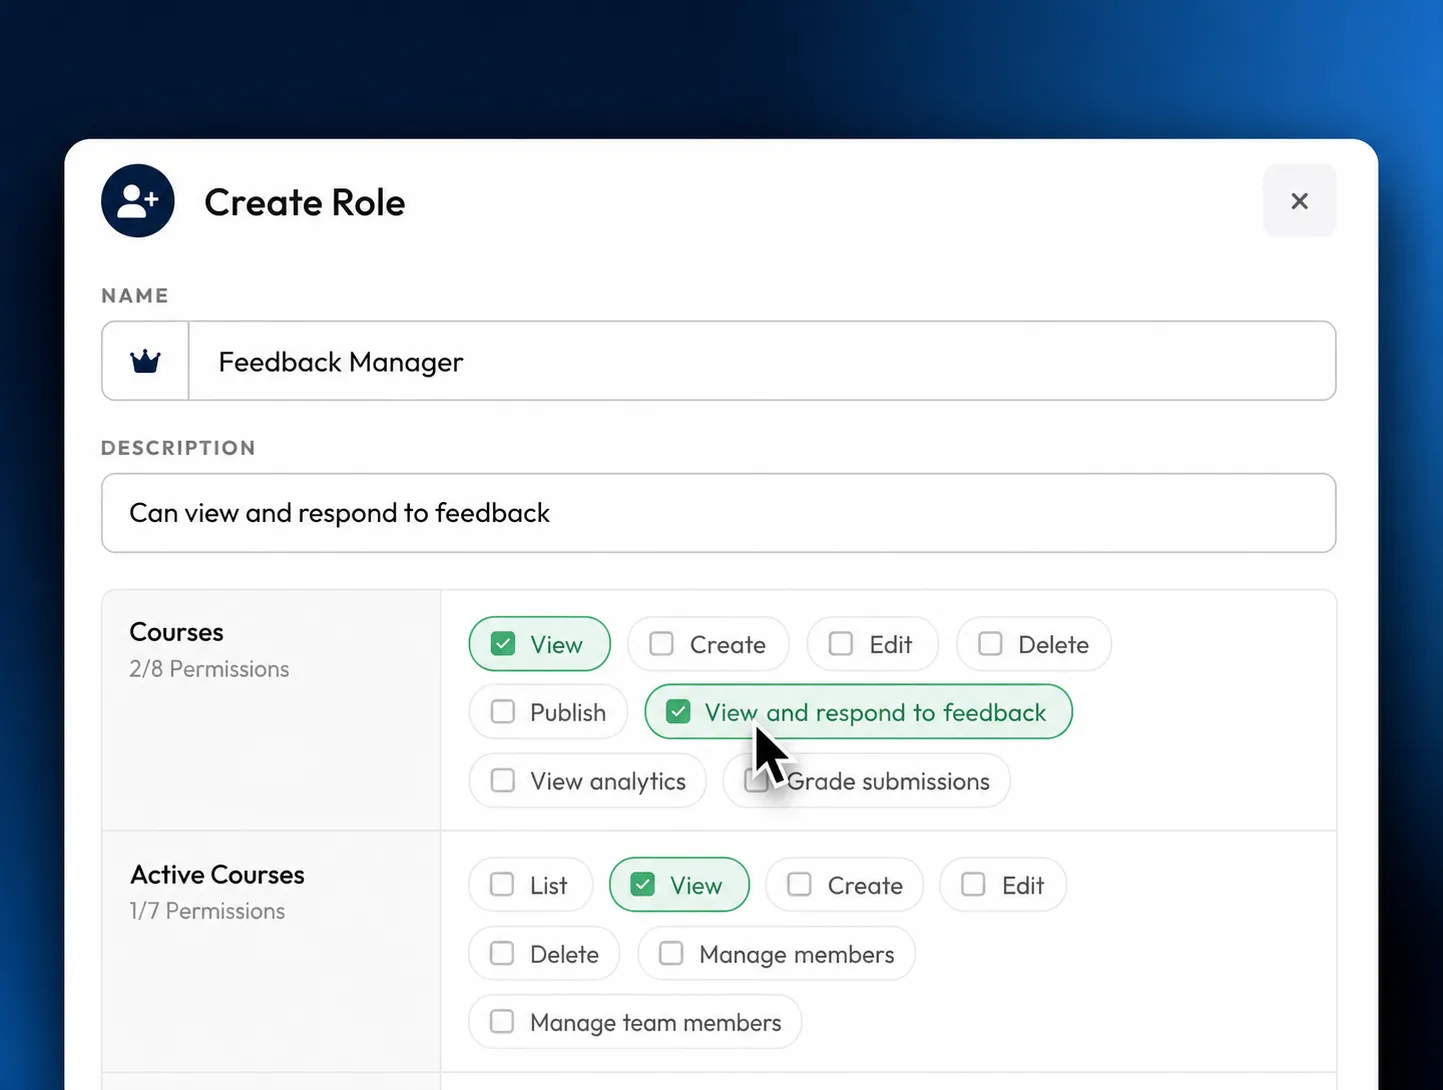
Alongside the predefined course roles, you can create custom roles and combine exactly the permissions someone needs in a course—from editing content and viewing statistics to managing members.
For example, a coach can grade submissions and respond to feedback without being able to edit course content. Once created, you can assign the role across all courses.
Create new course roles under “Roles & Permissions” by selecting “Create Course Role.”
Create Custom Permission Groups
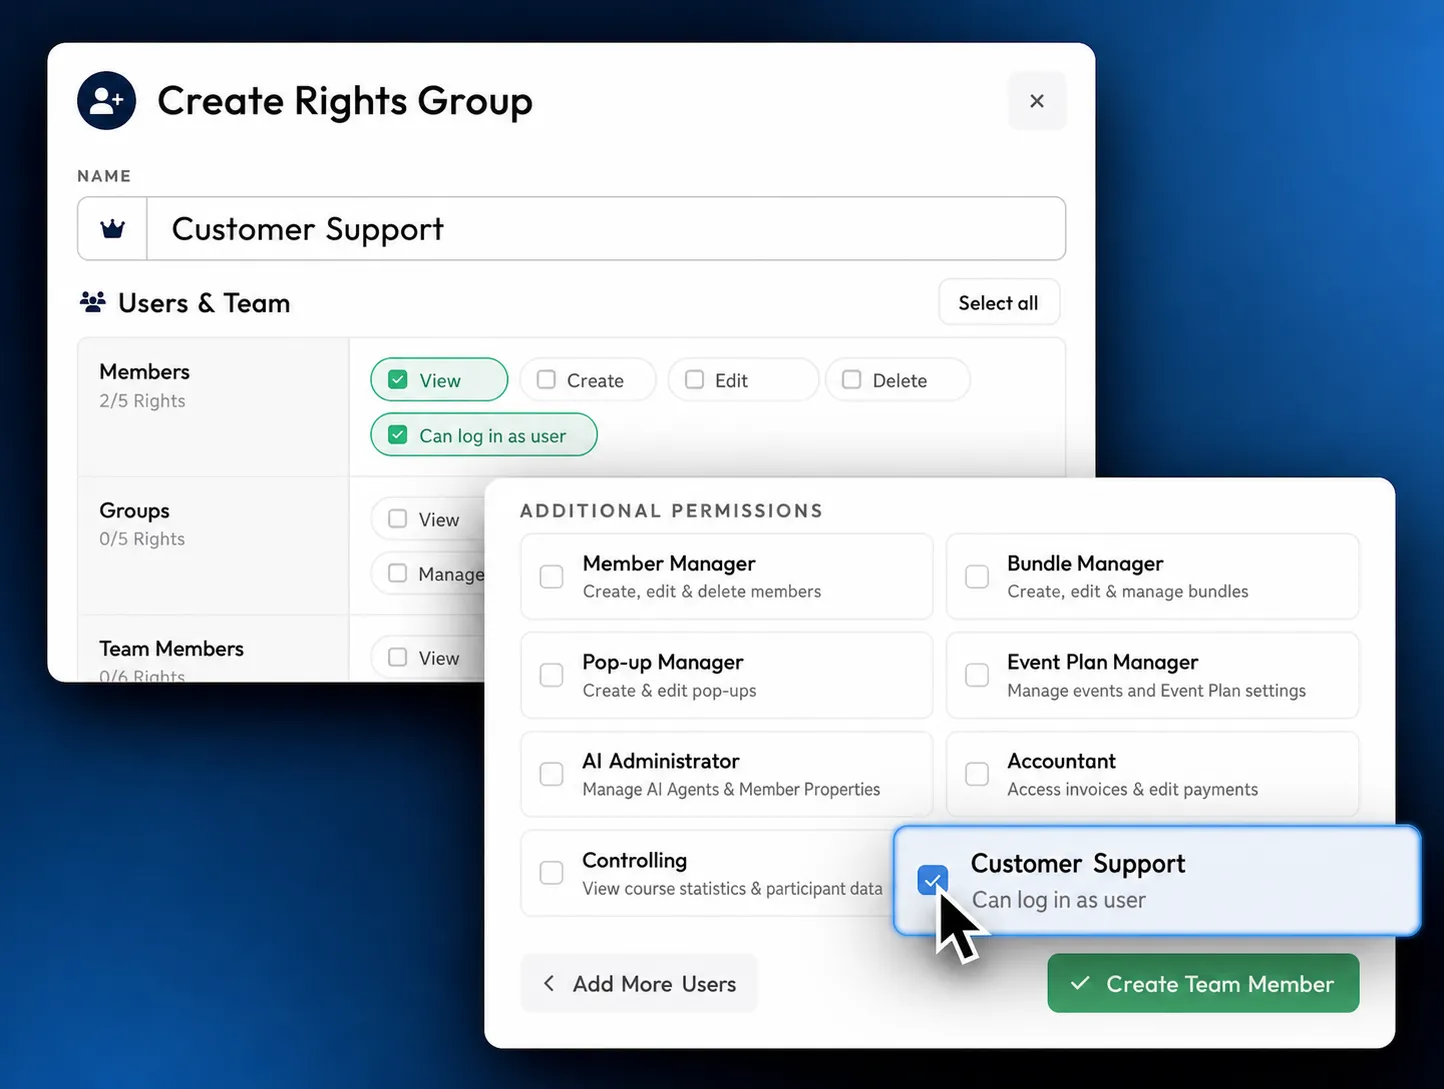
With custom permission groups, you can grant access to specific features in the admin area and flexibly combine them with predefined permissions such as Bundle Manager or Pop-up Manager.
For your support Team, for example, you can create a group that can view members and log in as a Member. Changes to a group apply immediately to every Team Member who has it.
Create new permission groups under “Roles & Permissions” by selecting “Create Permission Group.”